
Back in the beginning of 2019, I swore to myself (well, rather it was a New Year’s Resolutions that I wrote down) that I will impose a moratorium on PC upgrade.
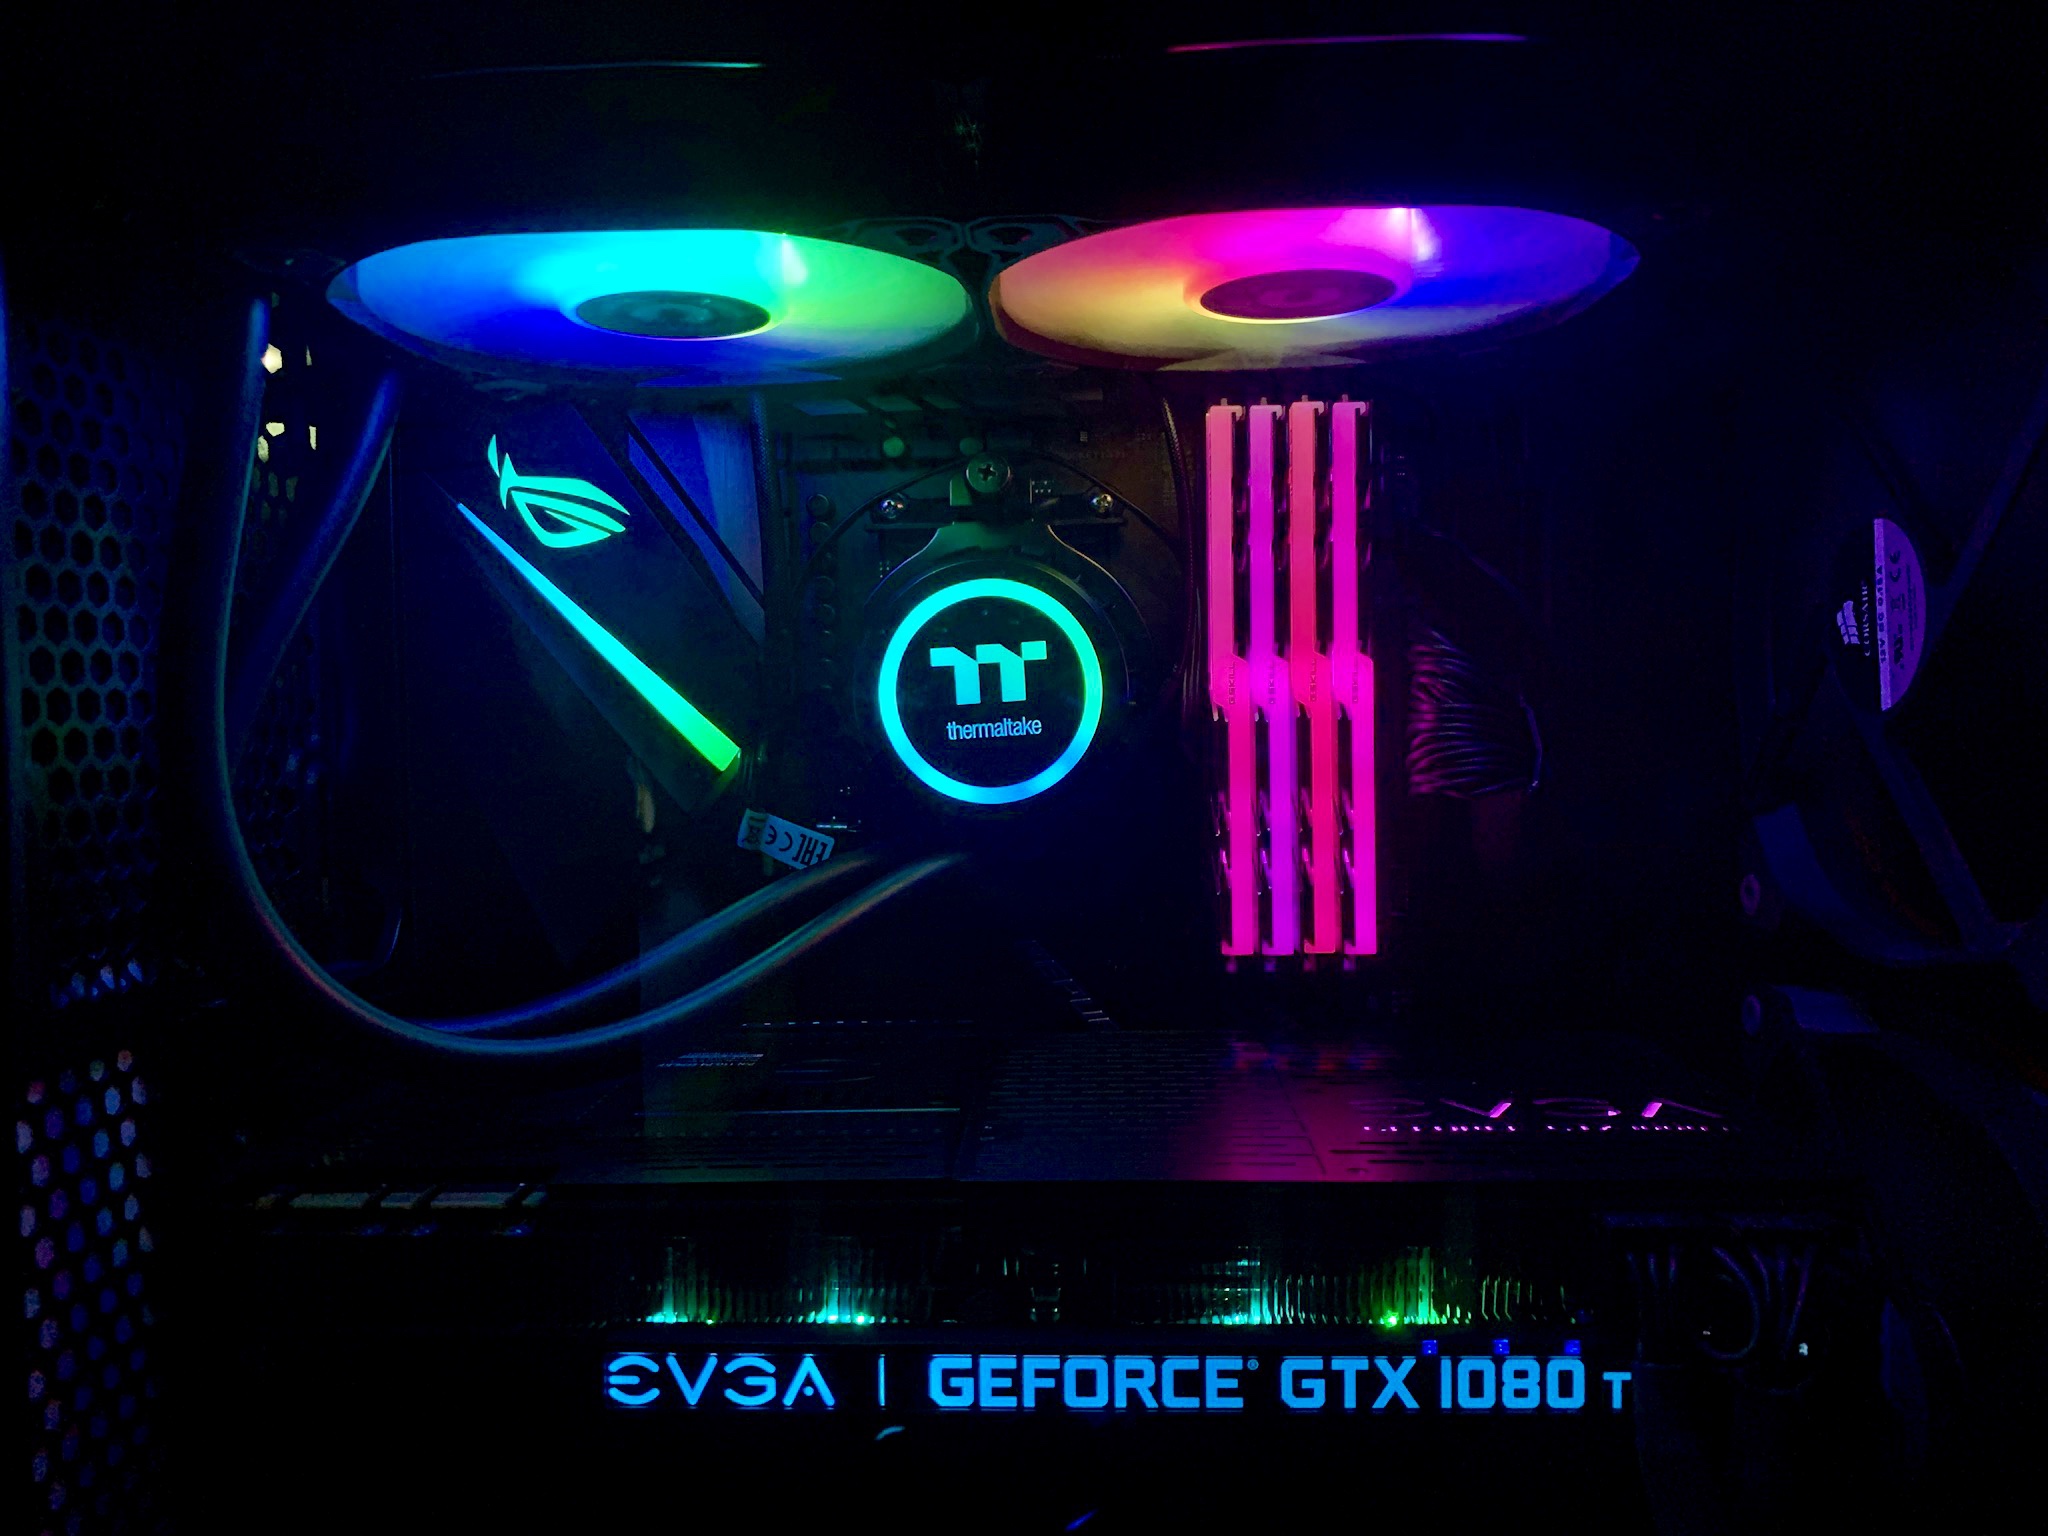
I broke that moratorium and went ahead in upgrading my PC cooling to an AIO build. I bought the Thermaltake Water 3.0 240mm ARGB sync, with addressable RGB, compatible with the Aura Sync system. Since I had the Asus motherboard, I connected the RGB header to the addressable header so that I can control that RGB using the Aura Sync software.
It works flawlessly. I can now control the RGB of my motherboard, AIO and the RAM sticks using a single software.
I don’t really know why I chose to upgrade my PC. Perhaps I was getting annoyed by the stock cooler being unable to sufficiently cool my CPU at full load. For some reason, my entire system will crash when it reaches a certain temperatures. But the problem wasn’t the high temperatures. I am pretty sure that the stock cooler was able to do its job is maintaining suitable temperatures when the CPU was at full load. However, my system will crash once it reaches a certain temperature threshold despite still being at a safe level, albeit high at times.
I took the plunge and decided to invest in an AIO. There are many AIOs out there on the market, some performing better than the one I decided on. I wasn’t choosing one with the best cooling capability, rather, I was actually choosing one that is aesthetically pleasing and easy to install. I believe the Thermaltake Water 3.0 240mm ARGB is the only AIO that uses the original CPU bracket to fix the AIO pump to the cpu. Other AIOs requires that you remove the bracket and backplate, and then install the AIO pump to the CPU using a series of proprietary brackets and screws provided. This is tedious and I am just lazy to do all these things.
Thankfully, I stumbled upon Thermaltake’s elegant solution. Why remove the original bracket and it works wonders? When I read the instruction manual on how to install Thermaltake’s AIO, I was singing praises for them. Installing their AIO was so easy! Not only that, with an addressable RGB, I don’t have to control the RGB using a separate software via internal USB connections from the motherboard or a proprietary hub. All is control from the motherboard and the accompanying RGB software, which is the Aura Sync. Such simplicity! I love it. Thermaltake is now my new favourite PC accessories brand.

Leave a comment